Pre-requisites
Safety Guidelines General Safety.
Power On Power On.
Network Interface Network Interface.
Installation Robot Installation.
Autostart
Autostart Configuration
Create a systemd service for automatic startup:
sudo nano /etc/systemd/system/hunter-ros2.service
Add:
[Unit]
Description=Hunter ROS 2 Base Driver
After=network.target

[Service]
Type=simple
User=your_username
ExecStart=/bin/bash -c "source /opt/ros/humble/setup.bash && source ~/hunter_ws/install/setup.bash && ros2 launch hunter_base hunter_base.launch.py"
Restart=on-failure

[Install]
WantedBy=multi-user.target
Enable:
sudo systemctl daemon-reload
sudo systemctl enable hunter-ros2.service
sudo systemctl start hunter-ros2.service
Check status:
sudo systemctl status hunter-ros2.service
Autostart Configuration
Configure the Hunter ROS 2 nodes to start automatically on boot.
MYBOTSHOP Platform Service
If using the MYBOTSHOP configuration, services are managed via systemd:
Start Platform Service:
sudo service hunter-platform start
Check Service Status:
sudo service hunter-webserver status
sudo service hunter-platform status
Service Status Indicators:
Green: Service is running correctly
Red: Service has failed - restart needed
Grey: Service has not started yet
Restart Service:
sudo service hunter-platform restart
Update Startup Job:
After modifying launch files, update the startup job:
ros2 run hunter_bringup startup_installer.py
Note
If the service is green, do not launch hunter_bringup manually as it’s already running in the background.
Manual Launch
Launch the hunter ROS driver manually:
ros2 launch hunter_bringup system.launch.py
Custom systemd Service
Create a custom service file:
sudo nano /etc/systemd/system/hunter-ros2.service
Add the following content:
[Unit]
Description=Hunter ROS 2 Base Driver
After=network.target

[Service]
Type=simple
User=your_username
Environment="ROS_DOMAIN_ID=0"
ExecStart=/bin/bash -c "source /opt/ros/jazzy/setup.bash && source ~/hunter_ws/install/setup.bash && ros2 launch hunter_base hunter_base.launch.py"
Restart=on-failure
RestartSec=5

[Install]
WantedBy=multi-user.target
Enable Service:
sudo systemctl daemon-reload
sudo systemctl enable hunter-ros2.service
sudo systemctl start hunter-ros2.service
Check Status:
sudo systemctl status hunter-ros2.service
View Logs:
journalctl -u hunter-ros2.service -f
CAN Interface Autostart
Create a script to bring up CAN on boot:
sudo nano /etc/network/interfaces.d/can0
Add:
auto can0
iface can0 inet manual
    pre-up /sbin/ip link set can0 type can bitrate 500000
    up /sbin/ip link set can0 up
    down /sbin/ip link set can0 down
Webserver
Web Interface
ROS 2 Web Bridge:
sudo apt install ros-humble-rosbridge-server
ros2 launch rosbridge_server rosbridge_websocket_launch.xml
This enables WebSocket communication with ROS 2 topics and services.
Foxglove Studio:
sudo apt install ros-humble-foxglove-bridge
ros2 launch foxglove_bridge foxglove_bridge_launch.xml
Connect using Foxglove Studio for visualization and debugging.
Web Interface
If the Hunter is configured with an onboard computer, a web interface may be available.
Accessing the Web Interface:
Connect to the robot’s network
Open a web browser
Navigate to
http://192.168.131.1:9000/
Login Credentials:
Username: admin
Password: mybotshop
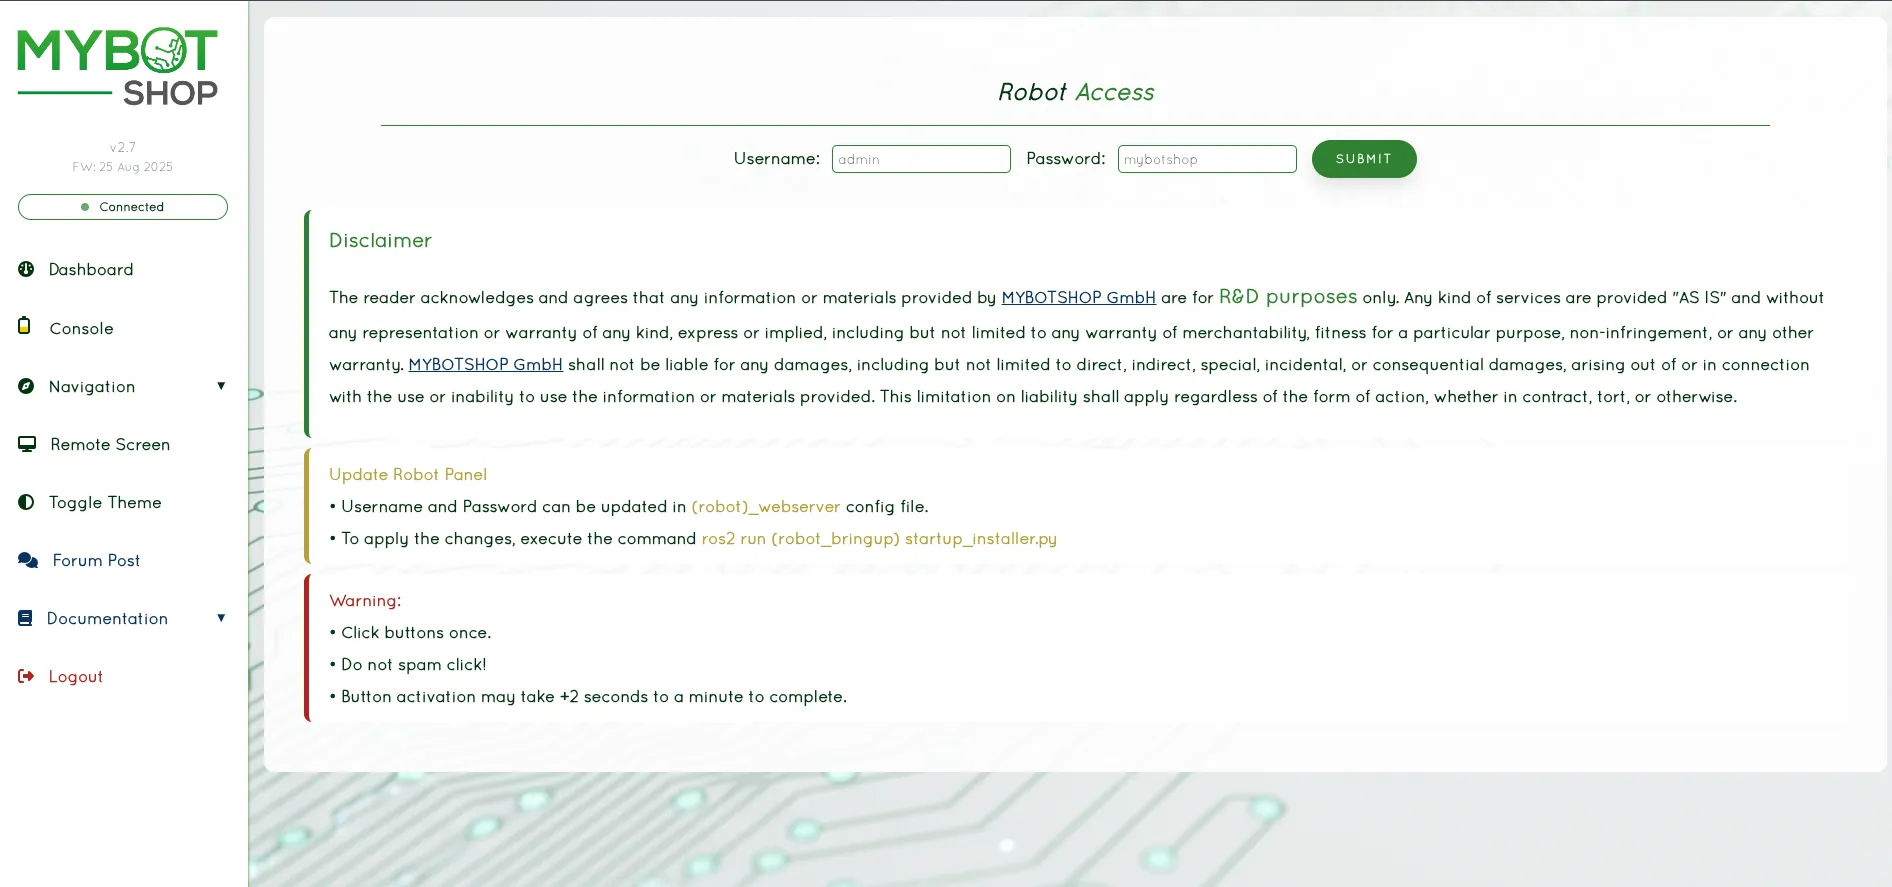
Web Login Interface
Dashboard
The dashboard provides system overview:
View IP Address of the HUNTER
View System load and status
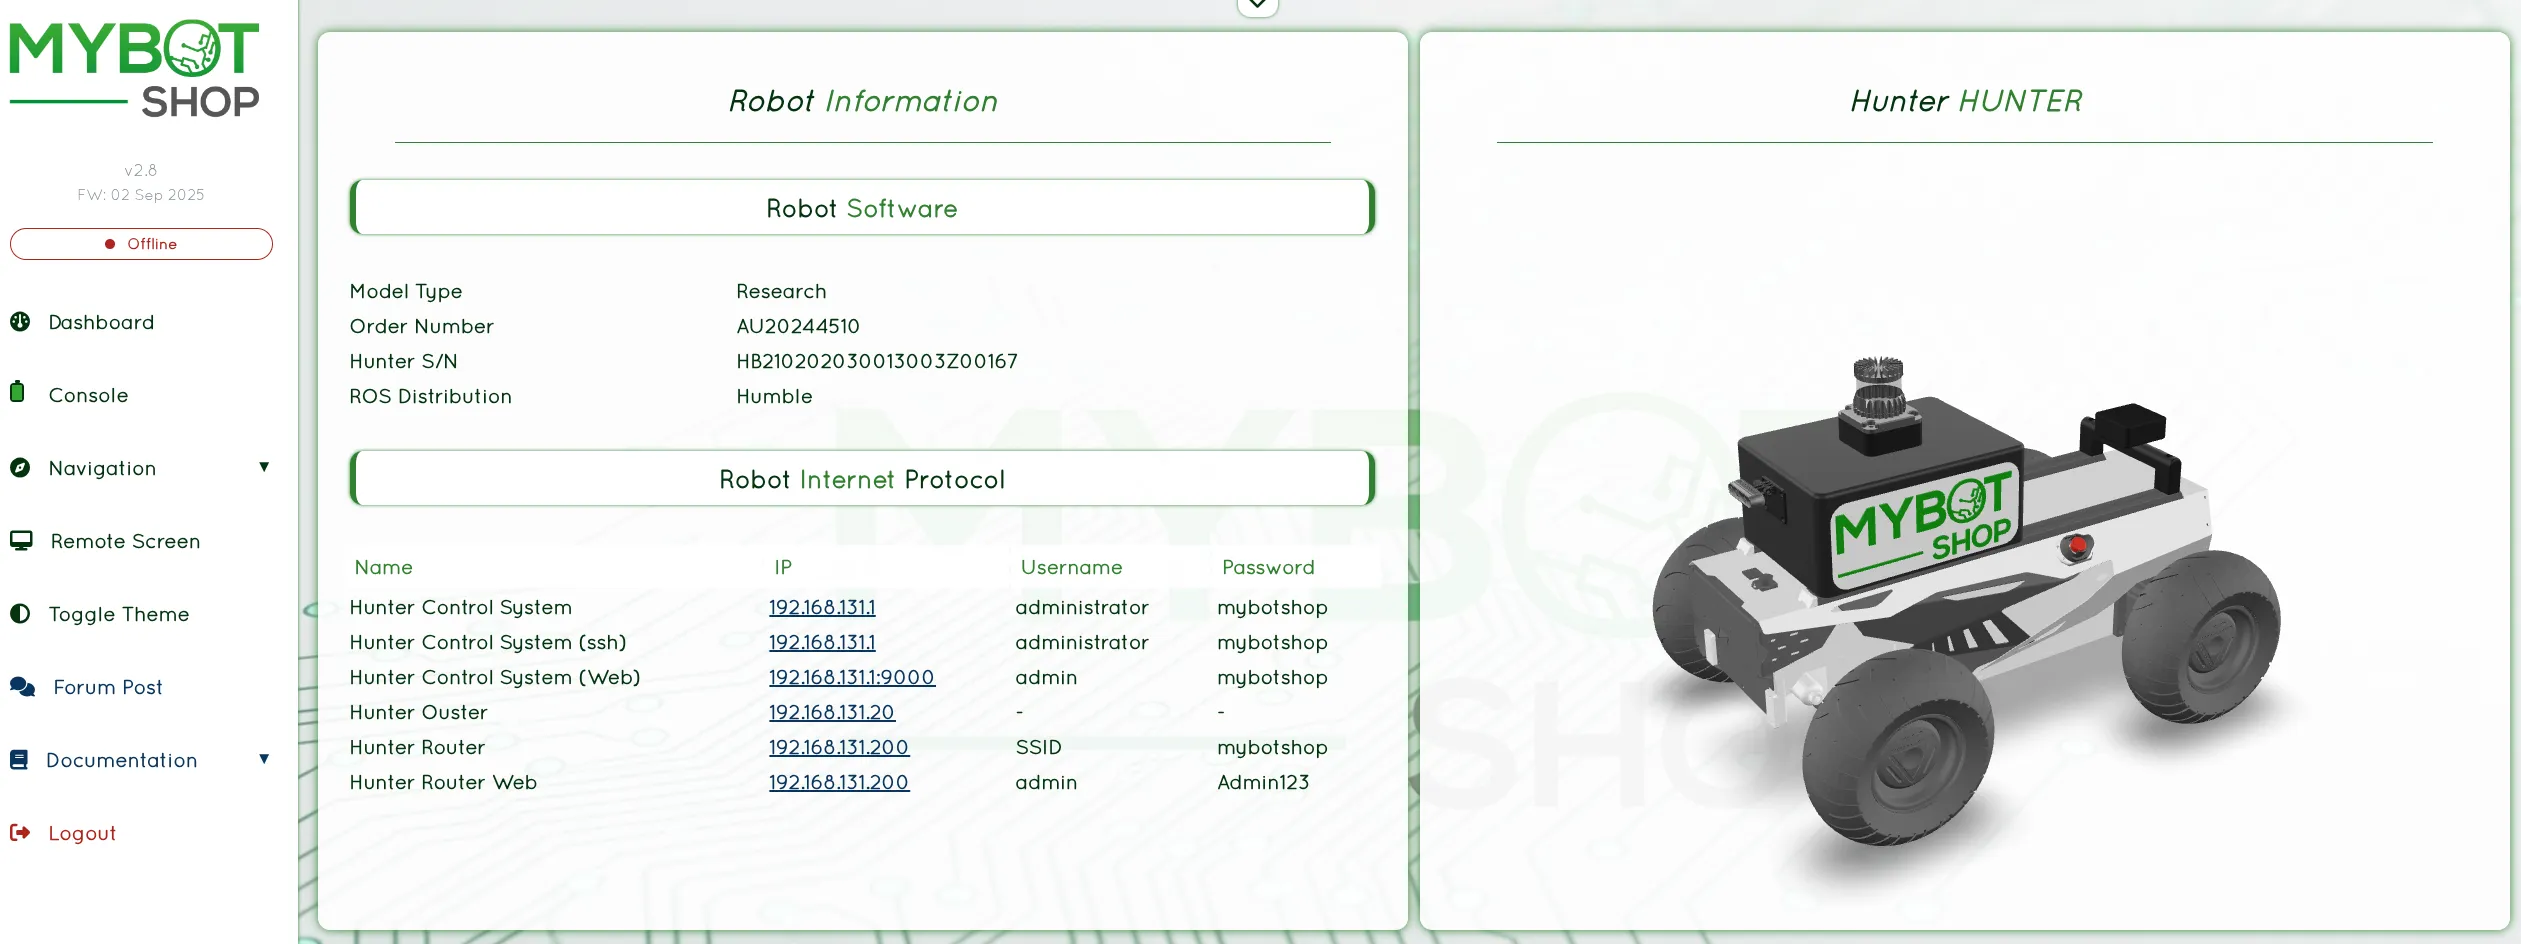
Web Dashboard
System Monitoring
Monitor system resources in real-time:
CPU, Memory, and Network usage
Temperature monitoring
System uptime and OS information

Web System Panel
Console
The console provides robot control features:
Enable/Disable HUNTER ROS2 Services
Battery status monitoring
Web Joystick control
Pre-configured action buttons
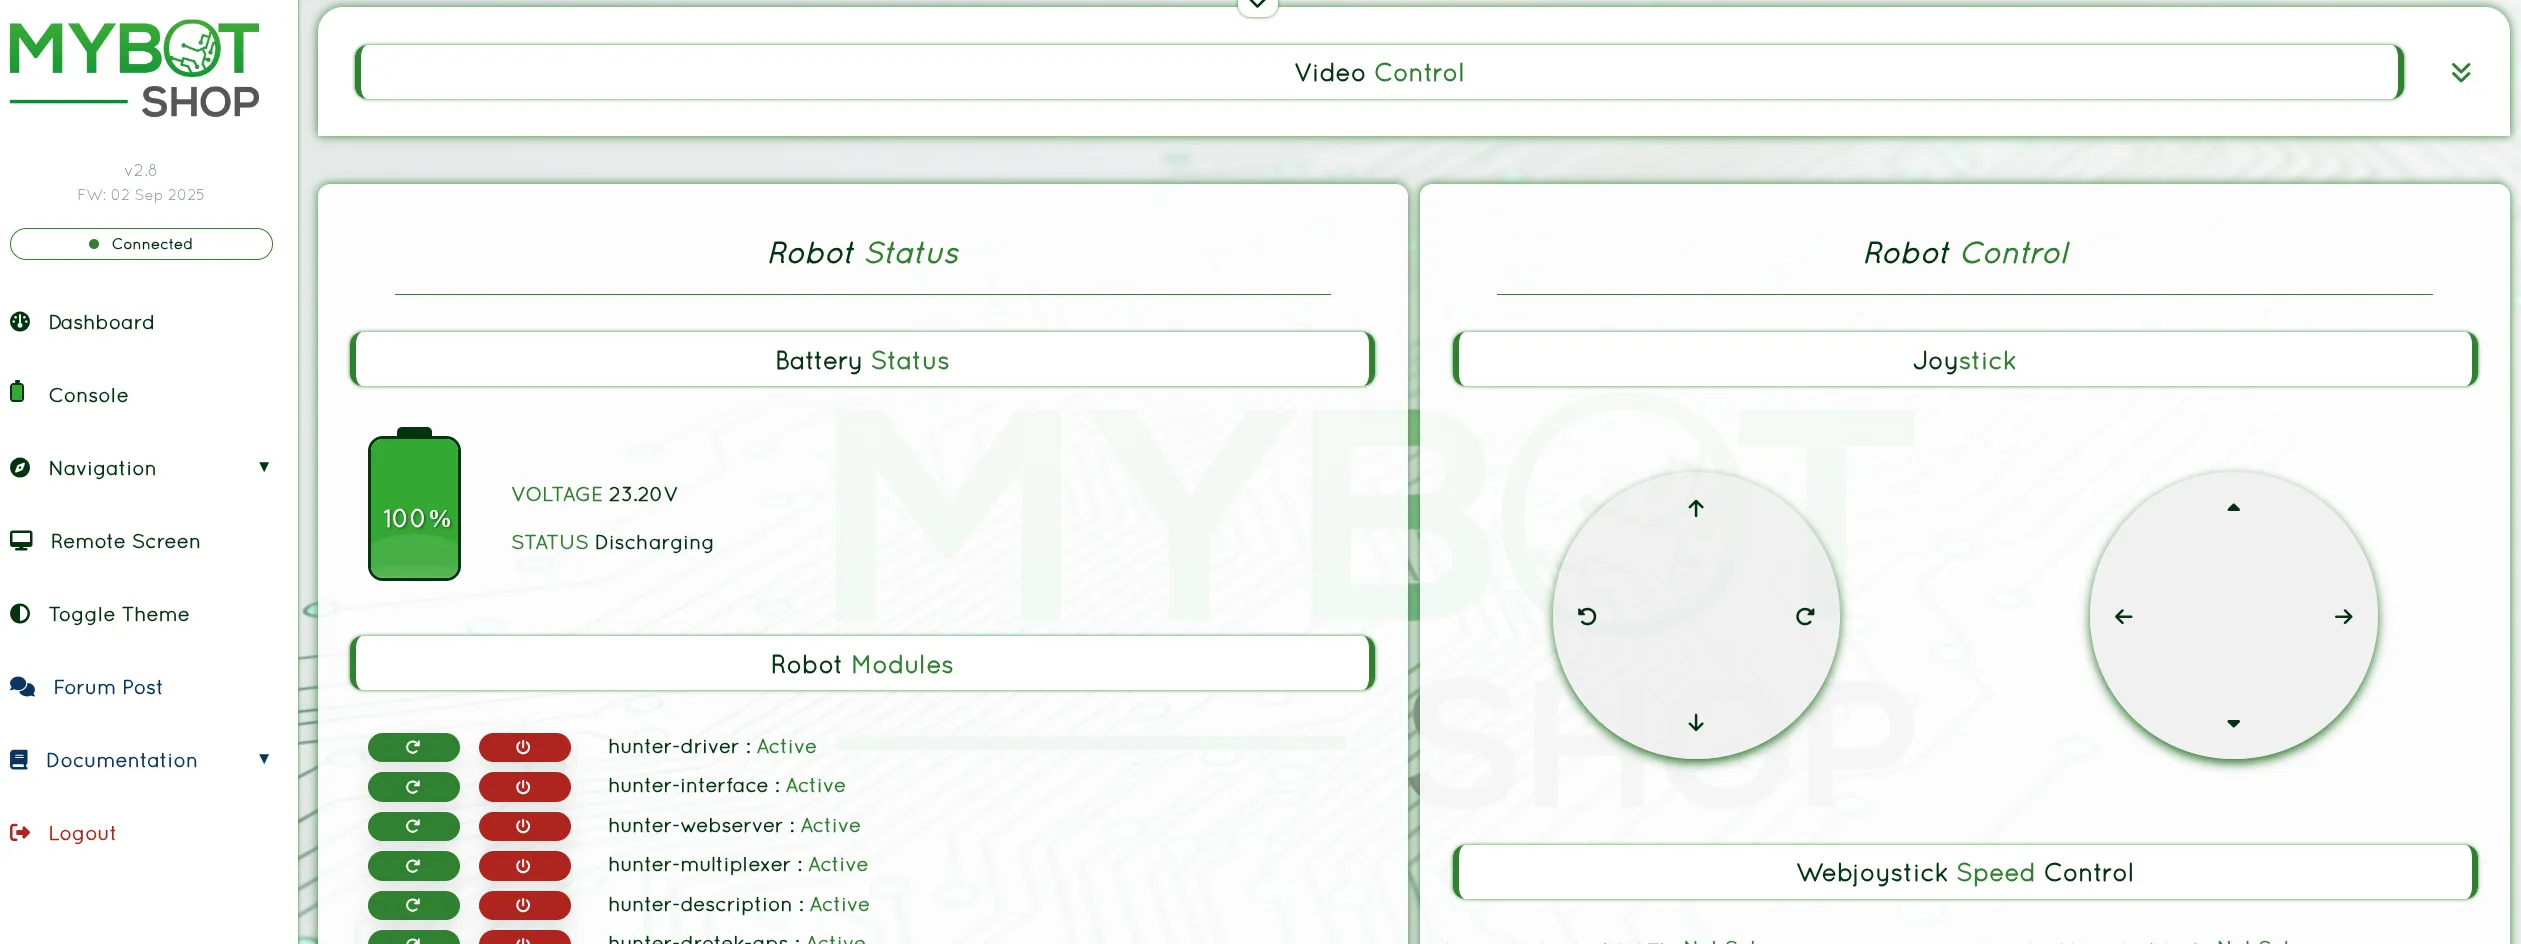
Web Console
Remote Desktop
Access the on-board NVIDIA computer desktop remotely:
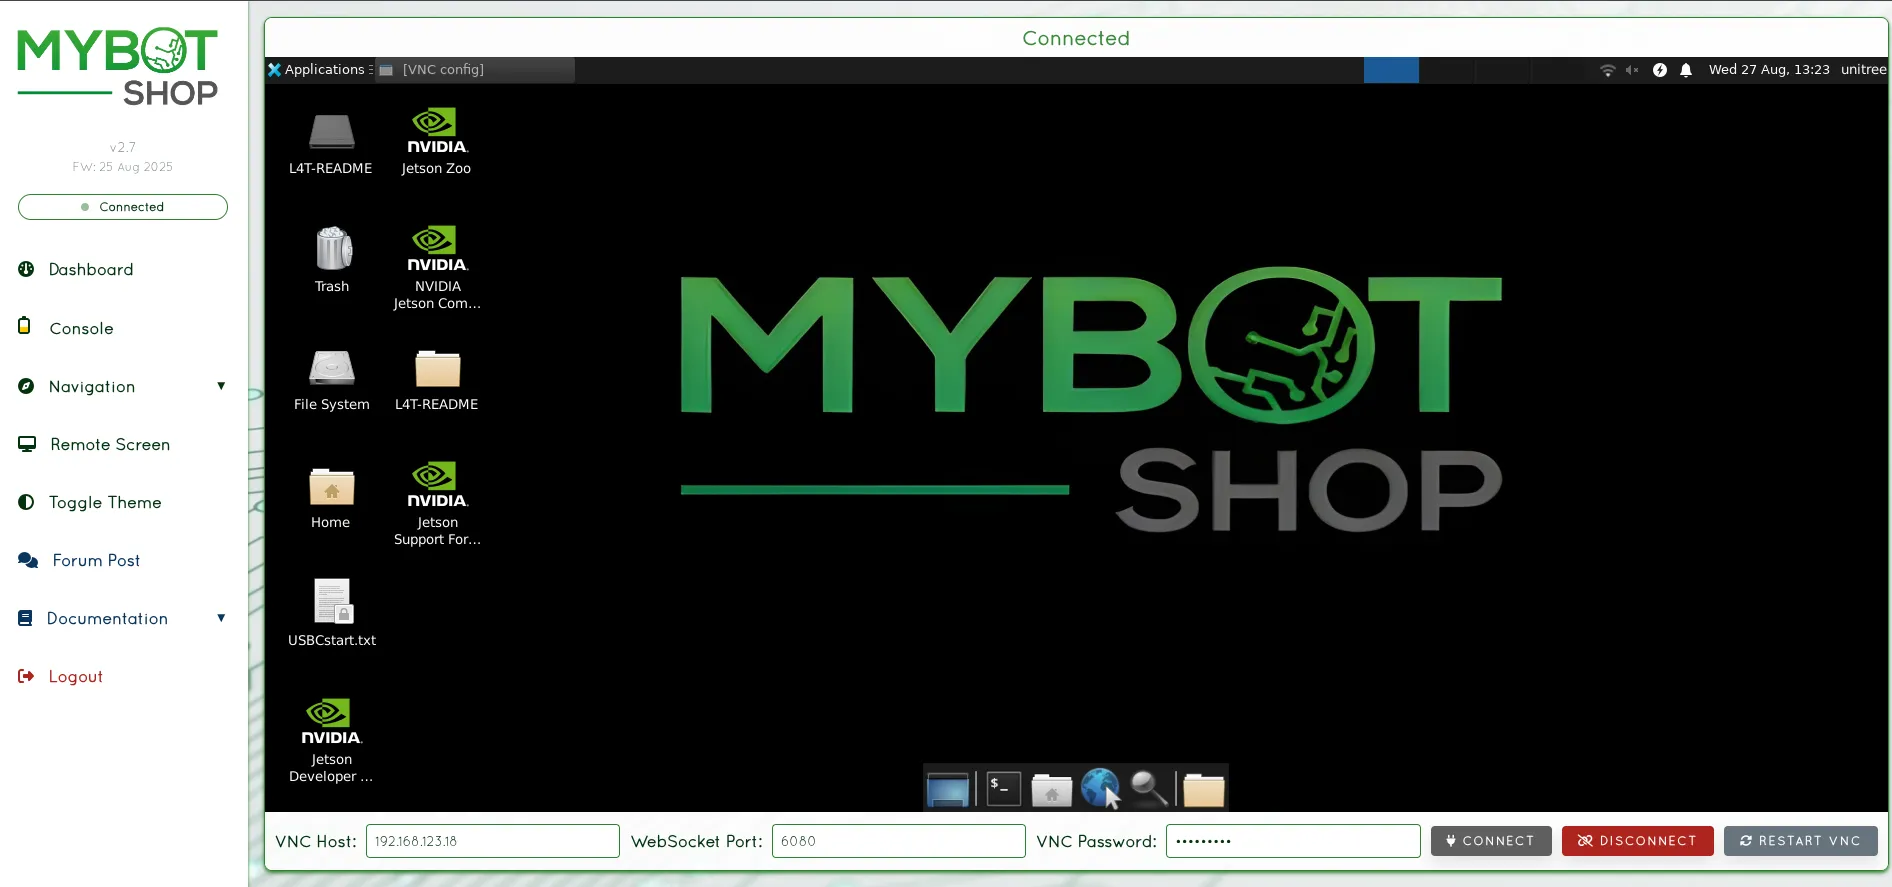
Web Remote Desktop
ROS 2 Web Bridge
For web-based ROS 2 interaction, install rosbridge:
sudo apt install ros-jazzy-rosbridge-server
Launch the bridge:
ros2 launch rosbridge_server rosbridge_websocket_launch.xml
This enables WebSocket communication with ROS 2 topics and services.
Foxglove Studio
For modern web-based visualization:
Install Foxglove Bridge:
sudo apt install ros-jazzy-foxglove-bridgeLaunch the bridge:
ros2 launch foxglove_bridge foxglove_bridge_launch.xmlOpen Foxglove Studio and connect to your robot.
Teleoperation
Keyboard Teleoperation
ros2 run teleop_twist_keyboard teleop_twist_keyboard
Keyboard Controls:
i: Forwardk: Stopj: Turn leftl: Turn right,: Backward
Joystick Teleoperation
sudo apt install ros-humble-joy ros-humble-teleop-twist-joy
ros2 launch teleop_twist_joy teleop-launch.py
Custom Velocity Commands
ros2 topic pub /cmd_vel geometry_msgs/msg/Twist "{linear: {x: 0.5}, angular: {z: 0.0}}"
Keyboard Teleoperation
Control the Hunter using keyboard:
ros2 run teleop_twist_keyboard teleop_twist_keyboard \
  --ros-args --remap cmd_vel:=/hunter_0001/cmd_vel
Keyboard Controls:
i: Forwardk: Stopj: Turn leftl: Turn right,: Backwardu: Forward-left curveo: Forward-right curve
Web Joystick
If using the MYBOTSHOP webserver, a web-based joystick is available:
Web console with joystick control
Joystick Teleoperation
Install joystick packages:
sudo apt install ros-jazzy-joy ros-jazzy-teleop-twist-joy
Launch joystick teleoperation:
ros2 launch teleop_twist_joy teleop-launch.py
RC Transmitter
The Hunter can also be controlled via the optional FS RC transmitter:
SWA: Parking mode switch (Up: released, Down: parking)
SWB: Control mode selector (Up: command mode, Middle: RC mode)
S1: Throttle control (forward/backward)
S2: Steering control (left/right)
Note
For PC control via ROS2, set SWB to the bottom 3rd position.
Custom Velocity Commands
Send velocity commands directly:
ros2 topic pub /hunter_0001/cmd_vel geometry_msgs/msg/Twist \
  "{linear: {x: 0.5}, angular: {z: 0.0}}"
Note
The Hunter uses Ackermann steering. Angular velocity is converted to steering angle internally. Recommended teleoperation speed: 0.2 m/s for mapping.
Visualization
RViz2 Visualization
Launch RViz2 with Hunter model:
ros2 launch hunter_description display.launch.py
View TF Tree
ros2 run tf2_tools view_frames
RViz2 Visualization
Launch RViz2 with Hunter model:
ros2 launch hunter_viz view_robot.launch.py
This displays:
Robot URDF model
TF frames
Coordinate axes
Sensor data (if available)
View Robot Model Only
To view just the robot model without running the base driver:
ros2 launch hunter_description display.launch.py use_rviz:=true
Web-Based Visualization
For remote visualization, use the web interface:
Remote desktop access for visualization
Custom RViz Configuration
Save your RViz configuration:
Configure displays as desired
File > Save Config As >
my_hunter_config.rviz
Load custom configuration:
rviz2 -d my_hunter_config.rviz
TF Tree
View the transform tree:
ros2 run tf2_tools view_frames
This generates a PDF showing the complete TF tree structure.
Foxglove Studio
For modern web-based 3D visualization:
Install Foxglove Bridge:
sudo apt install ros-jazzy-foxglove-bridgeLaunch the bridge:
ros2 launch foxglove_bridge foxglove_bridge_launch.xmlOpen Foxglove Studio and connect to your robot
Rigs
Sensor Mounting
The Hunter features aluminum T-slot rails for mounting sensors and equipment.
T-Slot Rail Specifications:
Standard aluminum profile
Compatible with M5/M6 T-nuts
Located on top panel
Power Output:
24V from expansion interfaces
Maximum 15A continuous
Auto-cutoff on low battery
Weight Distribution
Maximum payload: 150 kg (Hunter 2.0) / 50 kg (Hunter SE)
Center of gravity should remain low
Distribute weight evenly for stability
Sensor Mounting
The Hunter 2.0 features aluminum T-slot rails for mounting sensors and equipment.
T-Slot Rail Specifications:
Standard aluminum T-slot profile
Compatible with M5/M6 T-nuts
Located on top panel
Common Configurations
LiDAR Mount:
Mount 2D/3D LiDAR on top center for optimal FOV
Ensure clear line of sight (360° for spinning LiDAR)
Typical height: 20-30cm above chassis
Camera Mount:
Front-facing for navigation
Multiple cameras for surround view
Consider vibration dampening for sensitive cameras
Compute Box:
Mount securely to prevent movement
Ensure adequate ventilation
Route cables cleanly to prevent interference
Power Considerations
The Hunter provides:
24V power output from expansion interfaces
Maximum 15A continuous
Auto-cutoff on low battery
Plan power budget for all sensors and compute equipment.
Weight Distribution
Maximum payload: 150 kg (Hunter 2.0) / 50 kg (Hunter SE)
Center of gravity should remain low
Distribute weight evenly for stability
Manipulation
Robotic Arm Integration
The Hunter 2.0’s payload capacity supports integration with robotic manipulators.
Supported Arms:
Lightweight collaborative arms (< 10 kg)
Research-grade manipulators
Custom end effectors
ROS 2 Integration:
sudo apt install ros-humble-moveit
Configure MoveIt for your specific arm model.
Safety Considerations
Implement collision detection
Define safe workspace boundaries
Emergency stop should halt both base and arm
Consider arm weight in payload calculations
Note
Maximum payload: 150 kg (Hunter 2.0) / 50 kg (Hunter SE). Arm integration affects the robot’s center of gravity.
Robotic Arm Integration
The Hunter 2.0’s payload capacity supports integration with robotic manipulators.
Supported Arms:
Lightweight collaborative arms (< 10 kg)
Research-grade manipulators
Custom end effectors
Power Requirements
Arms typically require 24V or 48V power
Use the Hunter’s 24V expansion output for compatible arms
Consider external power supply for high-power arms
Communication
Common Interfaces:
CAN bus (shared with Hunter)
Ethernet
USB
RS-485
ROS 2 Integration
For arm integration with ROS 2:
sudo apt install ros-jazzy-moveit
Configure MoveIt for your specific arm model.
Safety Considerations
Implement collision detection
Define safe workspace boundaries
Emergency stop should halt both base and arm
Consider arm weight in payload calculations
Note
Arm integration significantly affects the robot’s center of gravity. Recalculate stability margins after adding a manipulator.
Navigation
Simultaneous Localization and Mapping
Install Nav2 and SLAM Toolbox:
sudo apt install ros-humble-navigation2 ros-humble-nav2-bringup
sudo apt install ros-humble-slam-toolbox
Launch SLAM:
ros2 launch slam_toolbox online_async_launch.py
Save the map:
ros2 run nav2_map_server map_saver_cli -f ~/maps/my_map
Odometry Navigation
Navigate using odometry without a map:
ros2 launch nav2_bringup navigation_launch.py
Map Navigation
Navigate with a pre-built map:
ros2 launch nav2_bringup bringup_launch.py map:=/path/to/map.yaml
Use RViz2 to set goals with “2D Goal Pose”.
GPS Navigation
For outdoor GPS-based navigation, integrate a GPS receiver and use robot_localization for sensor fusion.
Navigation Stack
The Hunter 2.0 supports Nav2 navigation stack for autonomous navigation.
Install Nav2:
sudo apt install ros-jazzy-navigation2 ros-jazzy-nav2-bringup
SLAM (Mapping)
Create a map using SLAM Toolbox:
sudo apt install ros-jazzy-slam-toolbox
Launch SLAM:
ros2 launch hunter_navigation slam.launch.py
Drive the robot around to build the map. Save the map:
ros2 run nav2_map_server map_saver_cli -f \
  /opt/mybotshop/src/mybotshop/hunter_nav2/maps/custom_map \
  --ros-args --remap map:=/hunter_0001/map
Rebuild to make the map available:
cd /opt/mybotshop/ && colcon build --symlink-install
source /opt/mybotshop/install/setup.bash
Web-Based Navigation
If using the MYBOTSHOP webserver, navigation can be controlled via the web interface:
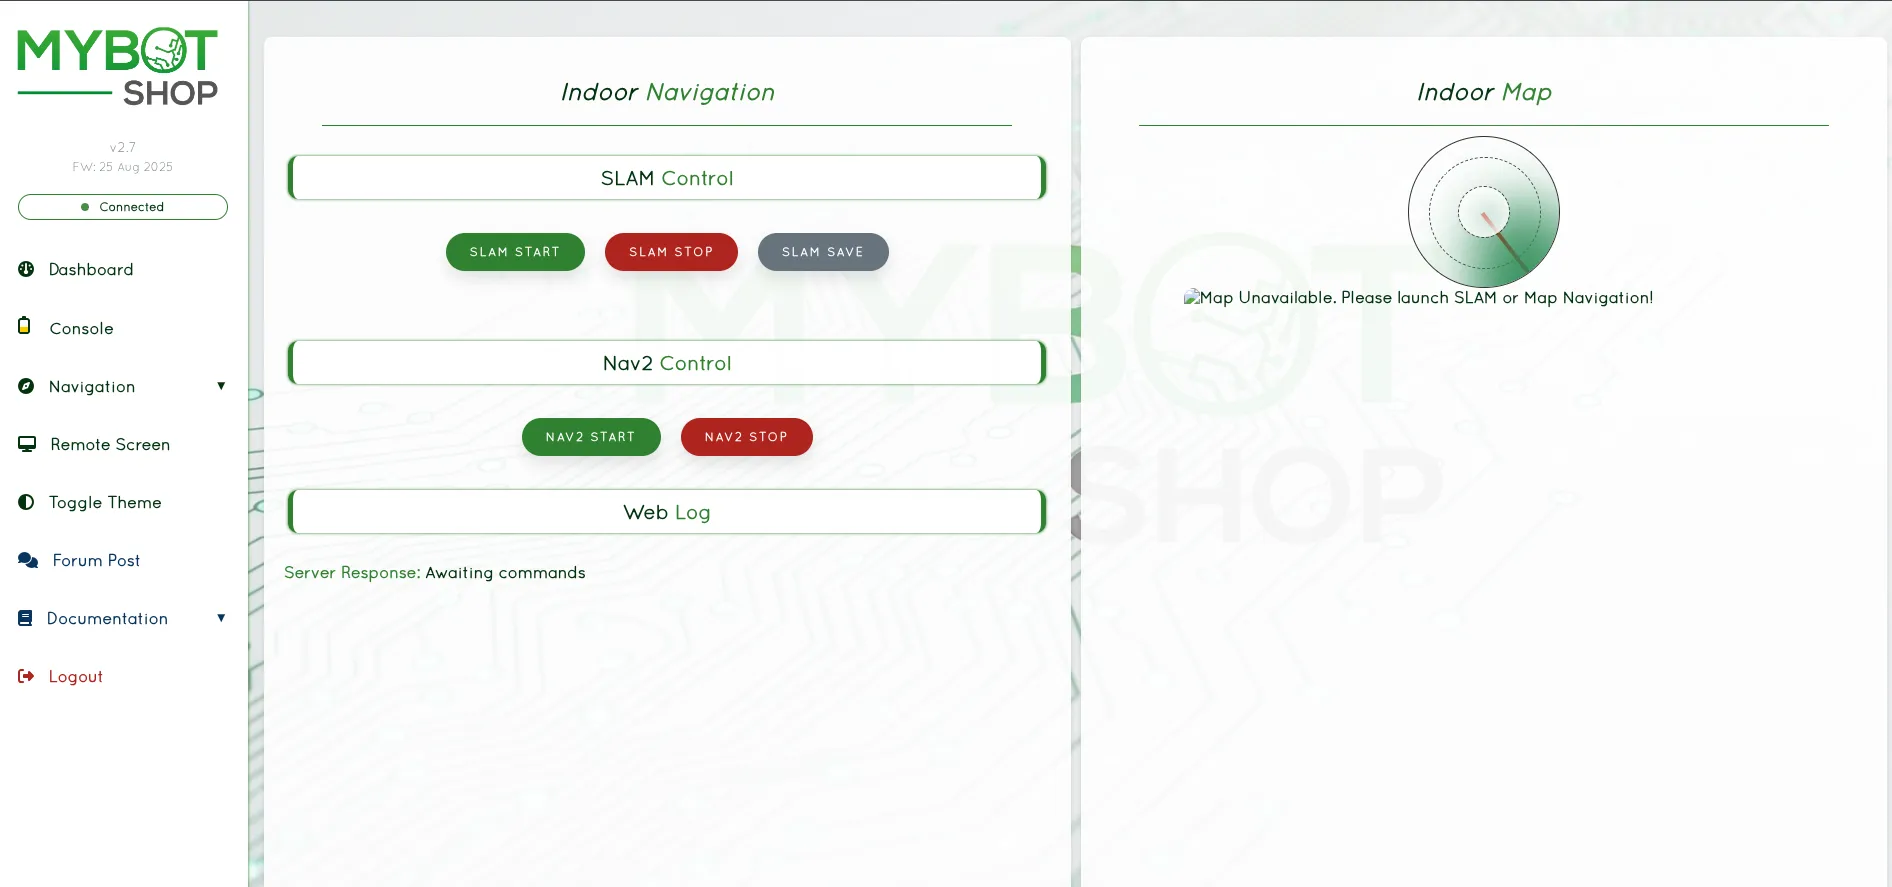
Web Navigation Interface with SLAM and Nav2 controls
Odometric Navigation
Navigate without creating a map:
ros2 launch hunter_navigation odom_navi.launch.py
Map Navigation
Navigate using a pre-built map:
ros2 launch hunter_navigation map_navi.launch.py
Localization
For navigation with a pre-built map, use AMCL:
ros2 launch nav2_bringup localization_launch.py map:=/path/to/map.yaml
Navigation
Launch the full navigation stack:
ros2 launch nav2_bringup navigation_launch.py
Use RViz2 to:
Set initial pose with “2D Pose Estimate”
Set goals with “2D Goal Pose”
Note
The Hunter uses Ackermann steering which requires appropriate Nav2 controller configuration. Use the Regulated Pure Pursuit controller or similar for best results.
Sensors
Depth Cameras
Supported depth cameras:
Intel RealSense D435/D455
ZED/ZED2 Stereo Camera
sudo apt install ros-humble-realsense2-camera
ros2 launch realsense2_camera rs_launch.py
Lidars
Supported LiDAR sensors:
Velodyne VLP-16
Ouster OS1
SICK LMS series
RPLidar
Connect to Hunter’s 24V expansion interface.
GPS
Supported GPS receivers:
u-blox series
Emlid Reach
Fixposition
Auxiliary Sensors
IMU (Xsens, Microstrain, Phidgets)
Ultrasonic sensors
Encoders
Connect sensors to the expansion ports providing 24V power and CAN communication.
Built-in Sensors
The Hunter 2.0 includes:
Wheel Encoders: For odometry calculation
Steering Angle Sensor: Magnetic encoder (2500 P/R)
Supported External Sensors
The Hunter’s aluminum T-slot rails and expansion interfaces support various sensors:
LiDAR:
Velodyne VLP-16
Ouster OS1
SICK LMS series
RPLidar
Cameras:
Intel RealSense D435/D455
ZED/ZED2 Stereo Camera
USB webcams
IMU:
Drotek IMU
Xsens MTi series
Microstrain
Phidgets IMU
GPS:
u-blox receivers
Emlid Reach
Fixposition
Ouster LiDAR
The Ouster LiDAR provides a 3D point cloud of the environment.
Launch Ouster:
ros2 launch hunter_lidars ouster.launch.py
Configuration:
IP Address: 192.168.131.20
Provides 3D point cloud data
Note
The Ouster is turned on by default when using the MYBOTSHOP platform service. Only launch manually when the auto service is turned off.
Intel RealSense D435
The Intel RealSense D435 depth camera provides RGB and depth data.
Launch RealSense:
ros2 launch hunter_depth_camera realsense_d435.launch.py
Configuration file:
/opt/mybotshop/src/mybotshop/hunter_depth_camera/launch/realsense_d435i.launch.py
Note
By default the RealSense D435 is off. The launch file is configured to enable continuous depth stream information without lag.
Adding Sensors
Connect sensors to the expansion ports:
24V Power: Available from expansion interface (max 15A continuous)
CAN: For CAN-based sensors (500kbps)
USB: Via onboard computer (if installed)
Sensor Topics
Common sensor topics:
/scan: 2D LiDAR scan/ouster/points: 3D point cloud/camera/color/image_raw: RealSense color image/camera/depth/image_rect_raw: RealSense depth image/imu/data: IMU data/gps/fix: GPS fix
Simulation
Gazebo Simulation
Install Gazebo:
sudo apt install ros-humble-gazebo-ros-pkgs
Launch Simulation:
ros2 launch hunter_gazebo hunter_gazebo.launch.py
The simulation provides the same topics as the real robot:
/cmd_vel: Velocity commands/odom: Odometry/tf: Transforms
Isaac Sim
NVIDIA Isaac Sim support is available for advanced simulation scenarios. Refer to the NVIDIA Isaac Sim documentation for setup instructions.
Gazebo Simulation
Simulate the Hunter in Gazebo for development and testing.
Install Gazebo:
sudo apt install ros-jazzy-gazebo-ros-pkgs
Launch Simulation:
ros2 launch hunter_gazebo hunter_gazebo.launch.py
This starts Gazebo with a Hunter model and ROS 2 interfaces.
Simulated Topics
The simulation provides the same topics as the real robot:
/cmd_vel: Velocity commands/odom: Odometry/tf: Transforms
Adding Sensors in Simulation
Modify the URDF/Xacro files to add simulated sensors:
LiDAR: Add
<gazebo>plugin for ray sensorCamera: Add camera plugin
IMU: Add IMU plugin
Custom Worlds
Launch with a custom world:
ros2 launch hunter_gazebo hunter_gazebo.launch.py world:=/path/to/world.sdf
Note
Simulation is useful for testing navigation and control algorithms before deploying on the real robot.
Packages
Hunter ROS 2 Packages
ugv_sdk
Low-level SDK for AgileX robots providing CAN communication interface.
hunter_base
Base driver package for Hunter 2.0/SE communication.
ros2 launch hunter_base hunter_base.launch.py
hunter_description
URDF models and meshes for Hunter robots.
ros2 launch hunter_description display.launch.py
hunter_msgs
Custom ROS 2 message definitions for Hunter robots.
Key Topics
/cmd_vel: Velocity commands/odom: Odometry data/hunter_status: Robot status/battery_state: Battery status
Hunter ROS 2 Packages
ugv_sdk
Low-level SDK for AgileX robots providing CAN communication interface.
hunter_base
Base driver package for Hunter 2.0/SE communication.
ros2 launch hunter_base hunter_base.launch.py
hunter_description
URDF models and meshes for Hunter robots.
ros2 launch hunter_description display.launch.py
hunter_msgs
Custom ROS 2 message definitions for Hunter robots.
Key Topics
Topic |
Description |
|---|---|
|
Velocity commands (geometry_msgs/Twist) |
|
Odometry data |
|
Robot status information |
|
Battery status |
Key Parameters
can_device: CAN interface name (default: “can0”)robot_model: Robot model type (“hunter2” or “hunter_se”)base_frame: Base frame ID (default: “base_link”)odom_frame: Odometry frame ID (default: “odom”)
Debugging
Debugging Commands
List Topics:
ros2 topic list
Check Topic Rate:
ros2 topic hz /odom
Echo Topic Data:
ros2 topic echo /hunter_status
Monitor CAN Traffic:
candump can0
Common Issues
Check CAN interface:
ip link show can0Verify CAN bitrate: 500000
Ensure emergency stop is released
Verify parking mode is released (SWA up)
Log Files
ros2 run rqt_console rqt_console
Common Debugging Commands
List Active Topics:
ros2 topic list
Check Topic Rate:
ros2 topic hz /odom
Echo Topic Data:
ros2 topic echo /hunter_status
View Node Info:
ros2 node list
ros2 node info /hunter_base_node
CAN Bus Debugging
Check CAN Interface:
ip link show can0
Monitor CAN Traffic:
candump can0
Send Test CAN Message:
cansend can0 123#DEADBEEF
Common Issues
Robot not responding:
Check CAN interface is up:
ip link show can0Verify CAN bitrate: 500000
Check emergency stop is released
Verify parking mode is released (SWA up)
No odometry:
Check wheel encoder connections
Verify hunter_base node is running
Check
/odomtopic is being published
Steering not working:
Check steering motor connections
Verify steering limits in parameters
Check for error codes on RC display
Log Files
View ROS 2 logs:
ros2 run rqt_console rqt_console
Miscellanious
Updating Packages
cd ~/hunter_ws/src/hunter_ros2
git pull
cd ~/hunter_ws
colcon build --symlink-install
CAN Protocol
The Hunter uses CAN bus at 500kbps. Refer to AgileX documentation for protocol details.
Network Configuration
sudo nmcli con mod "Wired connection 1" ipv4.addresses 192.168.1.100/24
sudo nmcli con mod "Wired connection 1" ipv4.method manual
sudo nmcli con up "Wired connection 1"
Time Synchronization
sudo apt install chrony
sudo systemctl enable chrony
sudo systemctl start chrony
Updating Packages
Update Hunter ROS 2 packages:
cd ~/hunter_ws/src/hunter_ros2
git pull
cd ~/hunter_ws
colcon build --symlink-install
CAN Protocol
The Hunter uses CAN bus at 500kbps for communication.
Key CAN IDs:
Motion control commands
Status feedback
Battery information
Error codes
Refer to the AgileX CAN protocol documentation for detailed frame definitions.
SDK Development
For custom development, use the ugv_sdk:
#include "ugv_sdk/mobile_robot/hunter_robot.hpp"

HunterRobot robot;
robot.Connect("can0");
robot.SetMotionCommand(0.5, 0.0);  // linear vel, steering angle
Network Configuration
Static IP Setup:
sudo nmcli con mod "Wired connection 1" ipv4.addresses 192.168.1.100/24
sudo nmcli con mod "Wired connection 1" ipv4.method manual
sudo nmcli con up "Wired connection 1"
Time Synchronization
For multi-machine setups, synchronize time:
sudo apt install chrony
sudo systemctl enable chrony
sudo systemctl start chrony
Backup Configuration
Back up your ROS 2 workspace:
tar -czvf hunter_ws_backup.tar.gz ~/hunter_ws
Installation
ROS 2 Humble Installation
Prerequisites:
Ubuntu 22.04
ROS 2 Humble installed
USB-to-CAN adapter
Install ROS 2 Humble:
sudo apt install software-properties-common
sudo add-apt-repository universe
sudo apt update && sudo apt install curl -y
sudo curl -sSL https://raw.githubusercontent.com/ros/rosdistro/master/ros.key -o /usr/share/keyrings/ros-archive-keyring.gpg
echo "deb [arch=$(dpkg --print-architecture) signed-by=/usr/share/keyrings/ros-archive-keyring.gpg] http://packages.ros.org/ros2/ubuntu $(. /etc/os-release && echo $UBUNTU_CODENAME) main" | sudo tee /etc/apt/sources.list.d/ros2.list > /dev/null
sudo apt update
sudo apt install ros-humble-desktop
Install Hunter ROS 2 Packages:
mkdir -p ~/hunter_ws/src
cd ~/hunter_ws/src
git clone https://github.com/agilexrobotics/ugv_sdk.git
git clone https://github.com/agilexrobotics/hunter_ros2.git -b humble
Install Dependencies:
cd ~/hunter_ws
rosdep install --from-paths src --ignore-src -r -y
Build Workspace:
cd ~/hunter_ws
colcon build --symlink-install
source install/setup.bash
Add to bashrc:
echo "source ~/hunter_ws/install/setup.bash" >> ~/.bashrc
CAN Interface Setup
sudo ip link set can0 up type can bitrate 500000
ROS 2 Jazzy Installation
Prerequisites:
Ubuntu 24.04
ROS 2 Jazzy installed
USB-to-CAN adapter
Install ROS 2 Jazzy:
sudo apt install software-properties-common
sudo add-apt-repository universe
sudo apt update && sudo apt install curl -y
sudo curl -sSL https://raw.githubusercontent.com/ros/rosdistro/master/ros.key -o /usr/share/keyrings/ros-archive-keyring.gpg
echo "deb [arch=$(dpkg --print-architecture) signed-by=/usr/share/keyrings/ros-archive-keyring.gpg] http://packages.ros.org/ros2/ubuntu $(. /etc/os-release && echo $UBUNTU_CODENAME) main" | sudo tee /etc/apt/sources.list.d/ros2.list > /dev/null
sudo apt update
sudo apt install ros-jazzy-desktop
Install Hunter ROS 2 Packages:
mkdir -p ~/hunter_ws/src
cd ~/hunter_ws/src
git clone https://github.com/agilexrobotics/ugv_sdk.git
git clone https://github.com/agilexrobotics/hunter_ros2.git
Install Dependencies:
cd ~/hunter_ws
rosdep install --from-paths src --ignore-src -r -y
Build Workspace:
cd ~/hunter_ws
colcon build --symlink-install
source install/setup.bash
Add to bashrc:
echo "source ~/hunter_ws/install/setup.bash" >> ~/.bashrc
CAN Interface Setup
Configure the CAN interface for communication with the Hunter:
sudo ip link set can0 up type can bitrate 500000
To make CAN interface persistent, create a systemd service or add to rc.local.